Last month I decided to finally mark something off of my bucket list.
Growing my own garden.
I actually had this on our Summer List 2011 too.
Never happened.
It is intimidating.
It's that simple.
And I have just enough of the perfectionism gene to say to heck with it because I feel I won't do it "right".
This time I threw caution to the wind and said, "I'm going for it."
Ok, so I lie.
Actually, it is simply the fact that my mom lives close enough now to hold my hand, every step of the way, that I have any courage whatsoever to pull the trigger on such a venture.
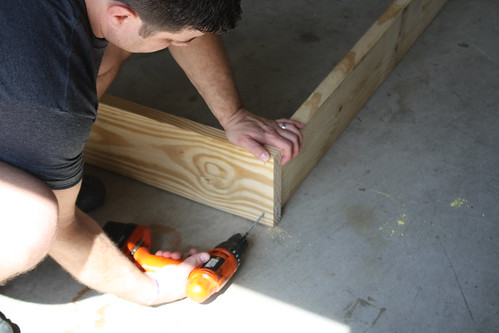
I started by buying three 16 ft. long 2X8 pieces of untreated lumber from Lowe's.
I had them cut two of those in half (these would be my long sides) and one of them into four equal pieces (these would be my ends).
This helped me build two 4X8 beds and utilize every piece of wood.
A box of 3 1/4" deck screws.
Twine.
Nails.
One truckload of "Holy Cow" all in one topsoil.
All of this, plus your veggies to plant, and you will be Farmer Brown in no time!
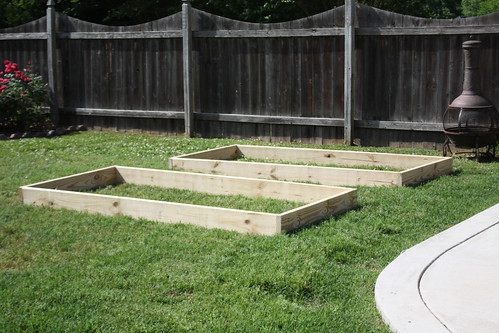
Adam screwed them together and then we placed them out in my fenced in patio area.
If you do not have a fenced in area you will need to put up something to keep the critters out.
I knew that if they were out of sight (behind the fence), they would be out of mind.
I needed to see them everyday to enjoy think about watering it.
Once the beds were level (I ended up moving one of them after this picture) we took up the top layer of grass then put down strips of weed control.
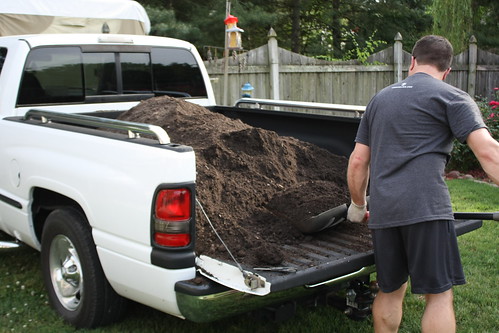
Then my hunk of a man scooped in the Holy Cow while we spread it in the beds evenly.
You will want it almost completely to the top.
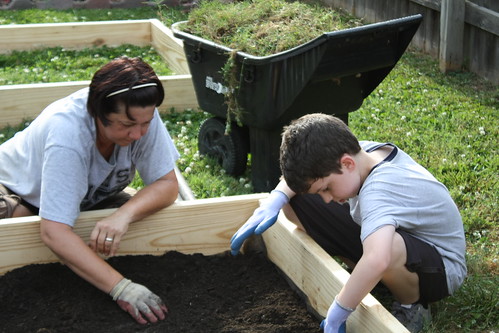
My mom was teaching Aidan how to spread the soil and break up the clumps.
She'll hate me for this.
I'll just pray she forgives me and be glad that she doesn't have her own blog.
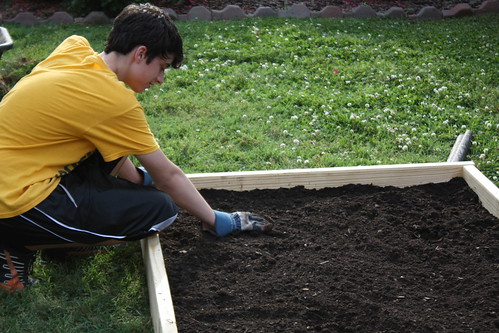
Even the teenager cheerfully he kept mysteriously vanishing got in on the work.
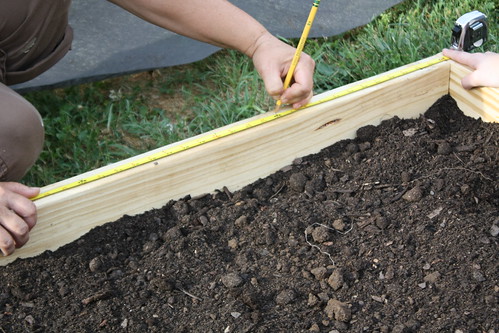
Then we took a tape measure and marked each one foot section with a pencil making an arrow tip that points into the bed.
The nail would go inside the arrow.
We did this all the way around.
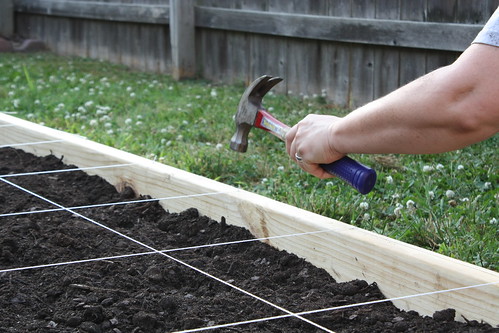
Then we nailed in the nails at each arrow at an angle.
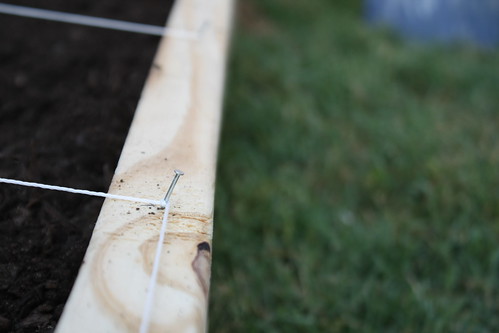
Leaving about this much sticking up.
Then I took twine and started it on one end tying a knot around the nail.
Then I would pass it down to the opposite end and we would loop it around the nail twice and move to the nail beside that one.
Then we would pass it back down lengthwise again,
Looping and passing till we got to the last nail then tying a knot.
We used the same procedure to go across the width of the bed as well.
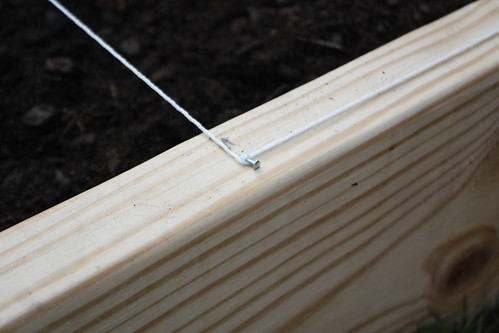
Then I used the hammer to bend over the nails and hammer them in to the wood a bit as to hold the twine securely and pull it as tight as possible.

Hope that makes sense.
In other words I did not tie a knot at each nail.
Only the beginning and ending nail.
The others I wrapped around twice then passed to the next nail.
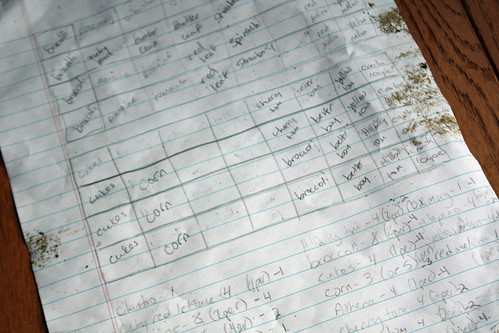
This was my paper where I had charted out all the veggies I would need to make room for.
This helped me to plot out where everything would be planted based on how much I had to plant and how many squares I had to plant in.
I advise you to Google the proper procedures for your specific veggies and fruits.
There are some rules to planting certain things.
Such as cucumbers and melons can't go side by side.
Nor can cantaloupe and watermelon.
Also you will need to know how many of each thing can fit into one square.
Tomatoes can go two to a square but lettuces can go 4 to a square.
It is worth the time to research for the most successful garden possible.
There really is a science to gardening which makes me appreciate the generations before me that literally lived off the land.
How resourceful they were.
How in sync with nature they had to be to make it all work.
And then to teach themselves to preserve it all winter without going bad?!
Mind blowing.

This was taken the day they were planted.
May 6, 2012
Bed #1: Broccoli, spinach, rosemary. jalapenos, red leaf lettuce, romaine, butter leaf lettuce, strawberries and baby watermelons.
Bed #2: Cucumbers, corn, sweet potatoes, load of different types of tomatoes, and cantaloupe.

This was my garden today.
May 30, 2012
It is a beast! :-)
I simply cannot wait to have 'mater sandwich from freshly picked tomatoes in my garden.

So proud of these two little jalapenos that are growing.
They are the first actual veggie I see forming thus far.
They are like my babies now.
I check them everyday.
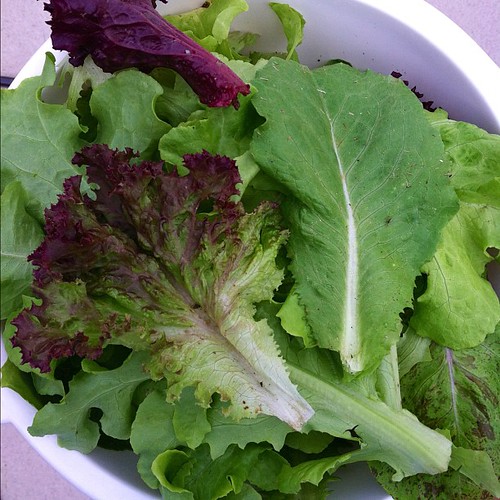
I picked these yesterday morning for a salad.
I washed them and put them in the salad spinner.
They are glorious...that is all I can say.
Completely organic too!
No better feeling.


Wednesday, May 30, 2012
"How Does Your Garden Grow?" {Square Foot Gardening}
"How Does Your Garden Grow?" {Square Foot Gardening}
Last month I decided to finally mark something off of my bucket list.
Growing my own garden.
I actually had this on our Summer List 2011 too.
Never happened.
It is intimidating.
It's that simple.
And I have just enough of the perfectionism gene to say to heck with it because I feel I won't do it "right".
This time I threw caution to the wind and said, "I'm going for it."
Ok, so I lie.
Actually, it is simply the fact that my mom lives close enough now to hold my hand, every step of the way, that I have any courage whatsoever to pull the trigger on such a venture.

I started by buying three 16 ft. long 2X8 pieces of untreated lumber from Lowe's.
I had them cut two of those in half (these would be my long sides) and one of them into four equal pieces (these would be my ends).
This helped me build two 4X8 beds and utilize every piece of wood.
A box of 3 1/4" deck screws.
Twine.
Nails.
One truckload of "Holy Cow" all in one topsoil.
All of this, plus your veggies to plant, and you will be Farmer Brown in no time!

Adam screwed them together and then we placed them out in my fenced in patio area.
If you do not have a fenced in area you will need to put up something to keep the critters out.
I knew that if they were out of sight (behind the fence), they would be out of mind.
I needed to see them everyday to enjoy
Once the beds were level (I ended up moving one of them after this picture) we took up the top layer of grass then put down strips of weed control.

Then my hunk of a man scooped in the Holy Cow while we spread it in the beds evenly.
You will want it almost completely to the top.

My mom was teaching Aidan how to spread the soil and break up the clumps.
She'll hate me for this.
I'll just pray she forgives me and be glad that she doesn't have her own blog.

Even the teenager cheerfully

Then we took a tape measure and marked each one foot section with a pencil making an arrow tip that points into the bed.
The nail would go inside the arrow.
We did this all the way around.

Then we nailed in the nails at each arrow at an angle.

Leaving about this much sticking up.
Then I took twine and started it on one end tying a knot around the nail.
Then I would pass it down to the opposite end and we would loop it around the nail twice and move to the nail beside that one.
Then we would pass it back down lengthwise again,
Looping and passing till we got to the last nail then tying a knot.
We used the same procedure to go across the width of the bed as well.

Then I used the hammer to bend over the nails and hammer them in to the wood a bit as to hold the twine securely and pull it as tight as possible.

Hope that makes sense.
In other words I did not tie a knot at each nail.
Only the beginning and ending nail.
The others I wrapped around twice then passed to the next nail.

This was my paper where I had charted out all the veggies I would need to make room for.
This helped me to plot out where everything would be planted based on how much I had to plant and how many squares I had to plant in.
I advise you to Google the proper procedures for your specific veggies and fruits.
There are some rules to planting certain things.
Such as cucumbers and melons can't go side by side.
Nor can cantaloupe and watermelon.
Also you will need to know how many of each thing can fit into one square.
Tomatoes can go two to a square but lettuces can go 4 to a square.
It is worth the time to research for the most successful garden possible.
There really is a science to gardening which makes me appreciate the generations before me that literally lived off the land.
How resourceful they were.
How in sync with nature they had to be to make it all work.
And then to teach themselves to preserve it all winter without going bad?!
Mind blowing.

This was taken the day they were planted.
May 6, 2012
Bed #1: Broccoli, spinach, rosemary. jalapenos, red leaf lettuce, romaine, butter leaf lettuce, strawberries and baby watermelons.
Bed #2: Cucumbers, corn, sweet potatoes, load of different types of tomatoes, and cantaloupe.

This was my garden today.
May 30, 2012
It is a beast! :-)
I simply cannot wait to have 'mater sandwich from freshly picked tomatoes in my garden.

So proud of these two little jalapenos that are growing.
They are the first actual veggie I see forming thus far.
They are like my babies now.
I check them everyday.

I picked these yesterday morning for a salad.
I washed them and put them in the salad spinner.
They are glorious...that is all I can say.
Completely organic too!
No better feeling.


Subscribe to:
Post Comments (Atom)


